
Final Project: 3700 Art Building
In the fourth and final semester of the Digital Design and Graphics Technology class, we were assigned to 3D model parts of the Napa Valley College campus and prepare these models for different outputs or deliverabes. This project is meant to be a long and ongoing project that future classes will add to every year. This was only the second year of this long, ongoing project and my class 3D modeled the first of many, many buildings on the Napa Valley College Campus. The building I volunteered to model was the 3700 Art Building, right across from our classroom. Little did I know, I had unknowingly volunteered for, what is in my opinion, the most difficult building to model. The deliverables we were required to output was a high resolution 3D model of our building with materials for a virtual 3D model of the campus, a low resolution model with materials to display on the Micrisoft Hololense 2, and scaled down version of our model that is 3D printable, for a 4'x8' scale model of the entire Napa Valley College campus. You can see why this project is going to multiple years and multiple classes to complete.
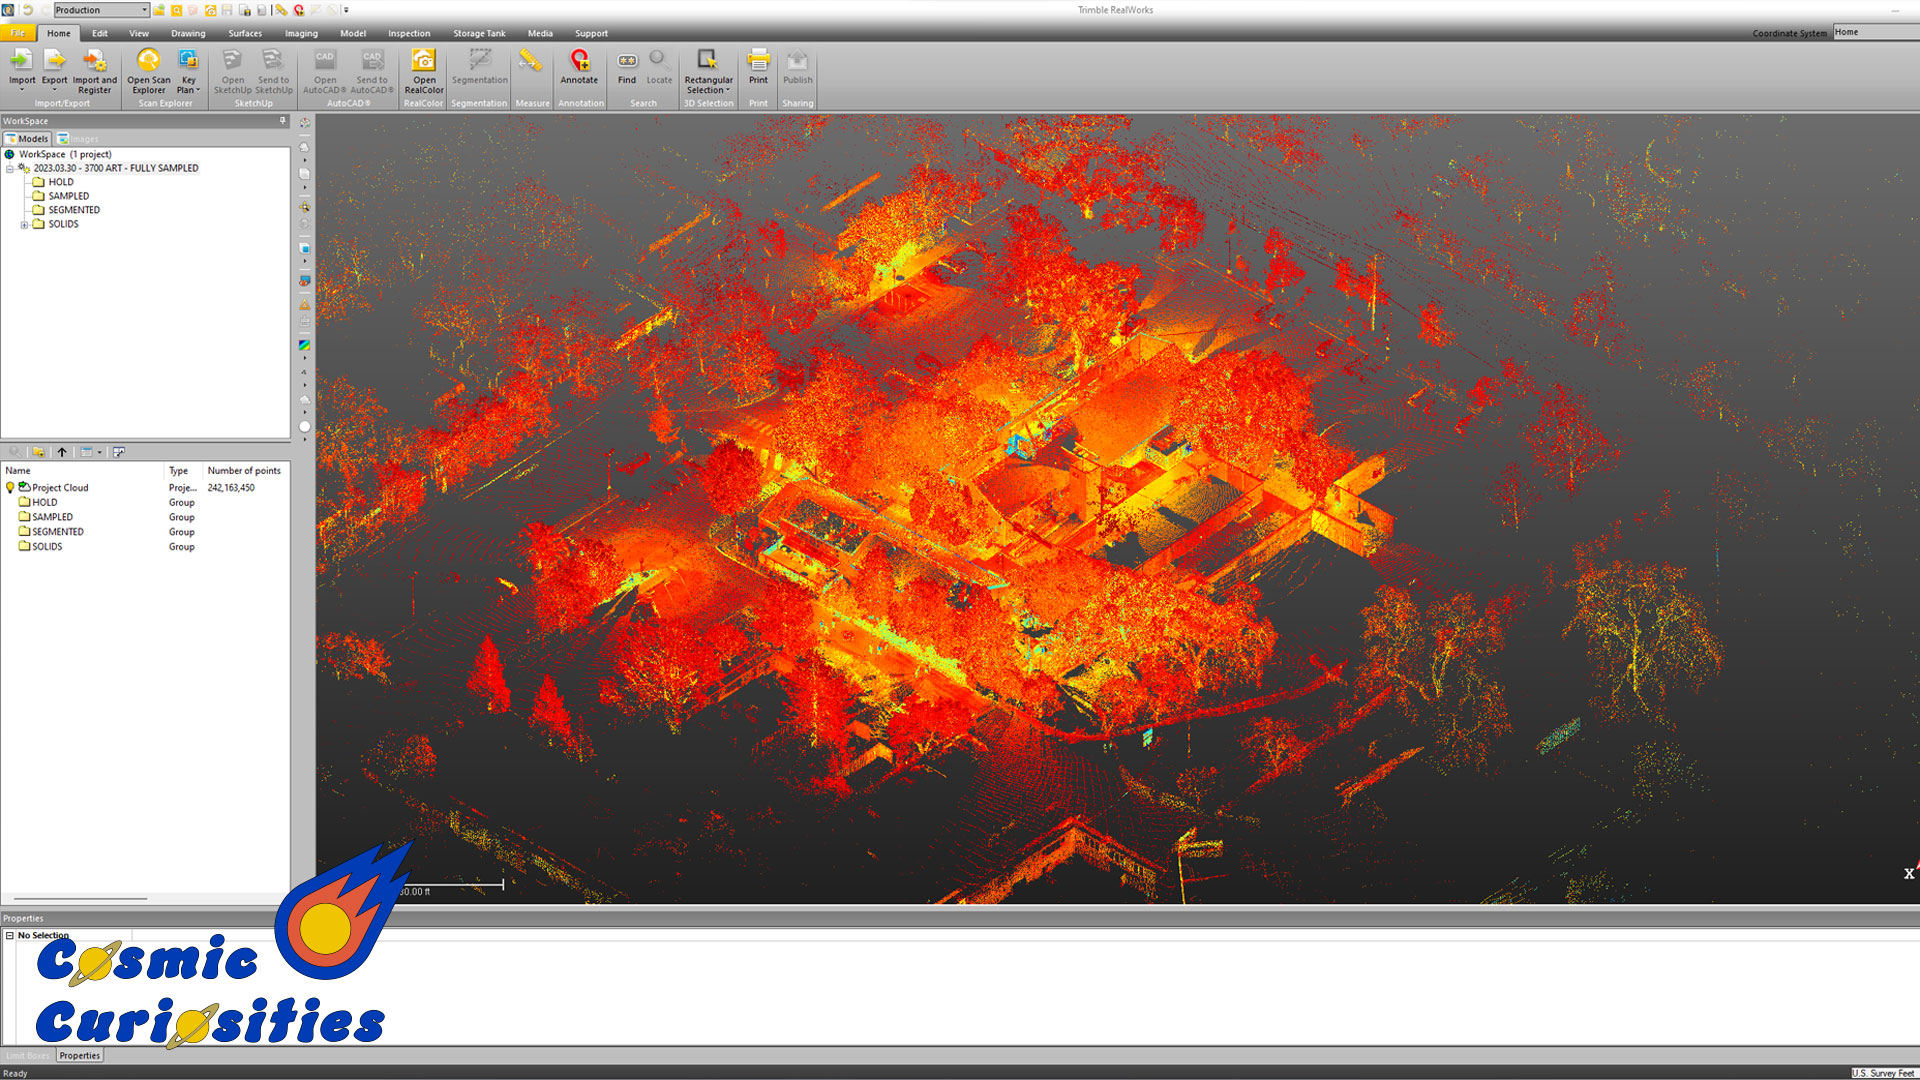
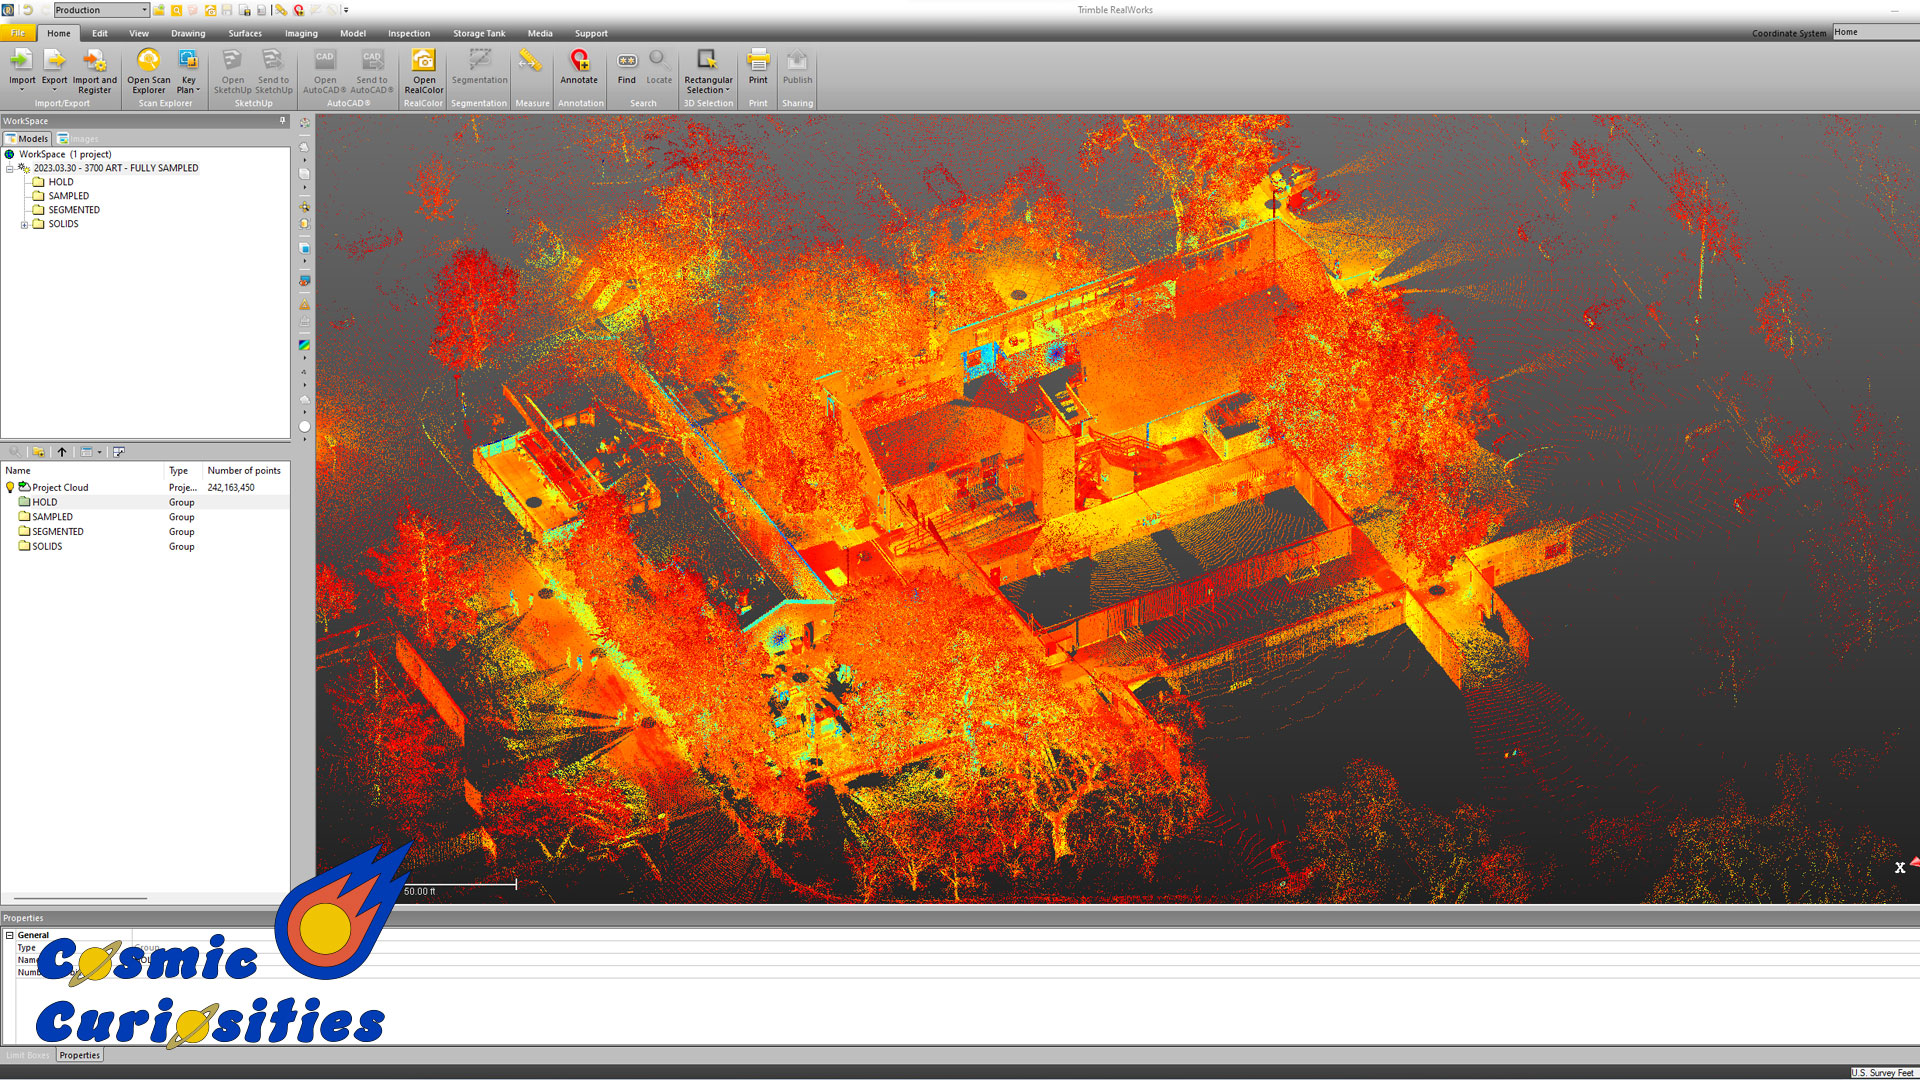
To start off, we used the Trimble tx6 Laser Scanner to create virtual point clouds of our buildings. This piece of equipment is worth well over $10,000 and I feel very fortunate to have had the opportunity to use it and gain experience with the software. These point clouds may look like 3D models, but they are actually millions and millions of single points that form the shape of what was scanned. Just my section containing my art building was over 200,000,000 points. Using the Trimble Real Works software we were able to segment parts of the point clound so that were were just left with our individual buildings.
To start off, we used the Trimble tx6 Laser Scanner to create virtual point clouds of our buildings. This piece of equipment is worth well over $10,000 and I feel very fortunate to have had the opportunity to use it and gain experience with the software. These point clouds may look like 3D models, but they are actually millions and millions of single points that form the shape of what was scanned. Just my section containing my art building was over 200,000,000 points. Using the Trimble Real Works software we were able to segment parts of the point clound so that were were just left with our individual buildings.
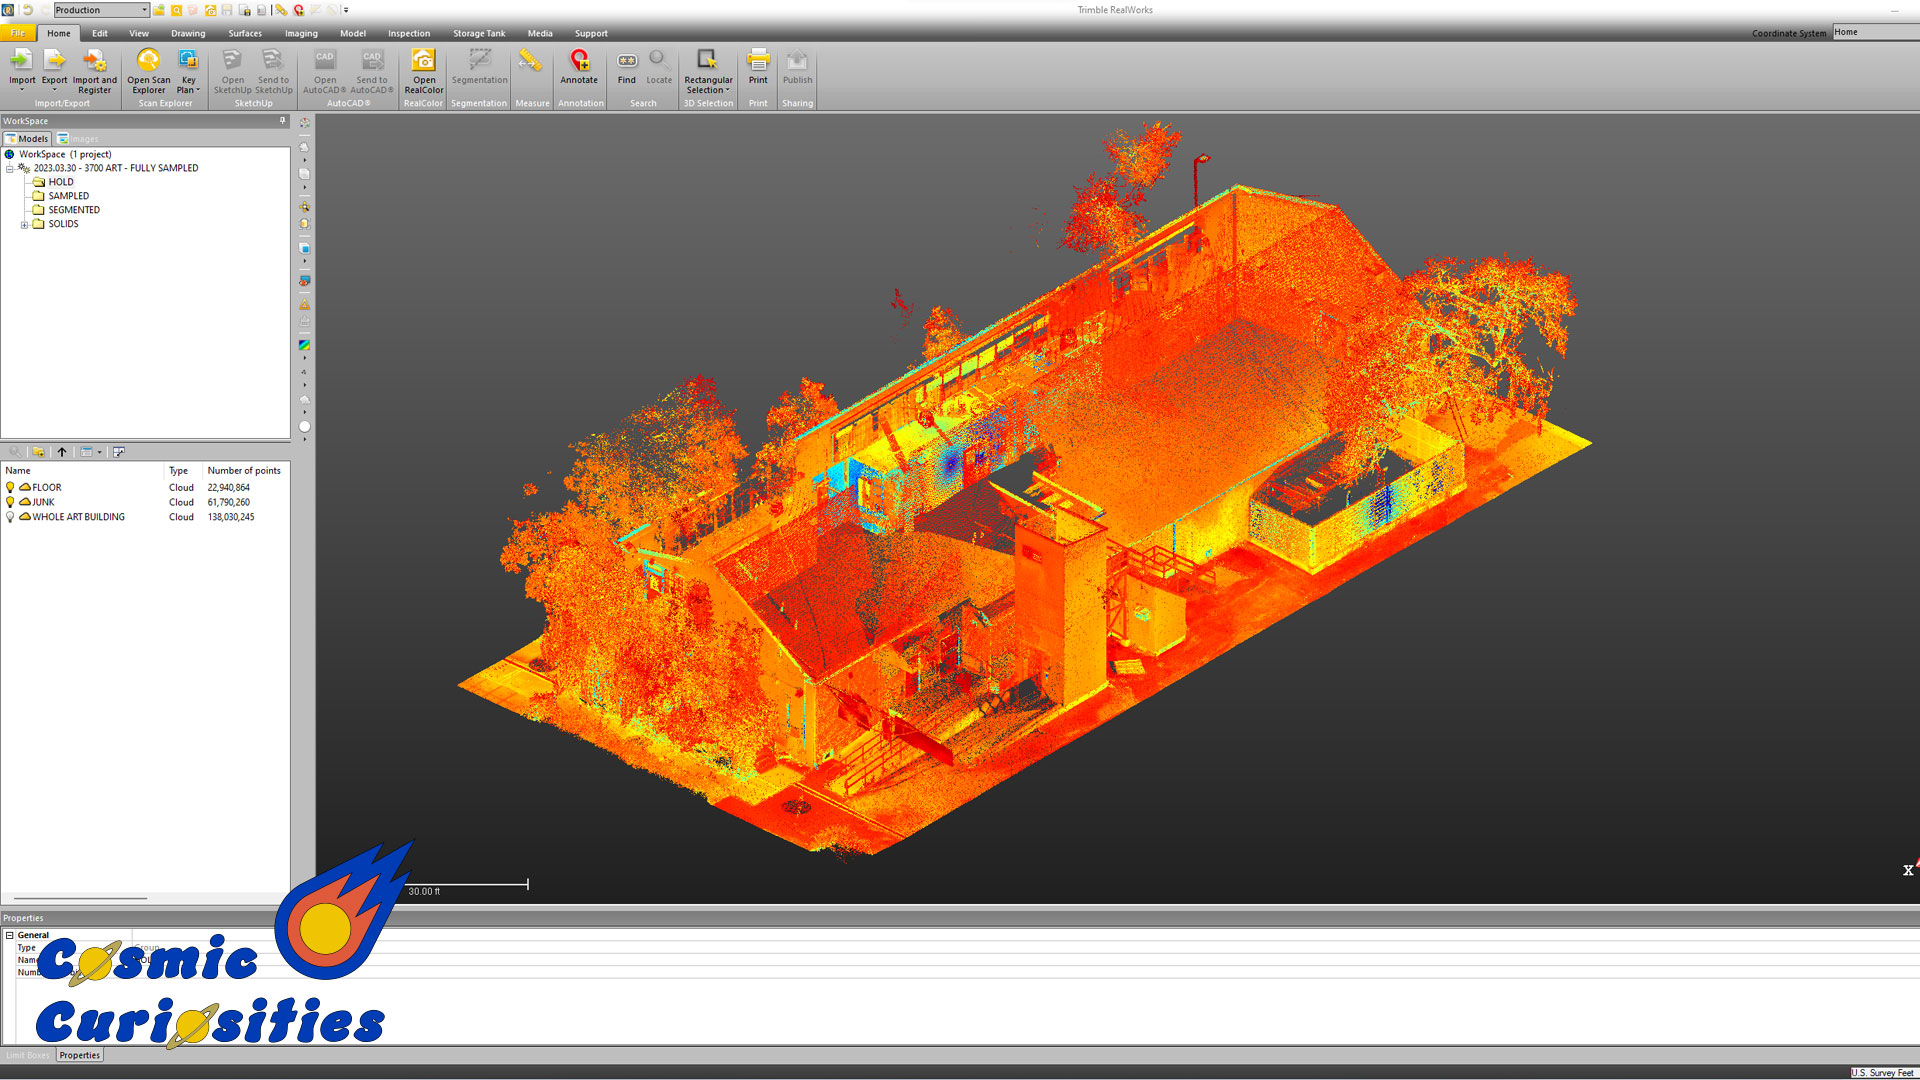
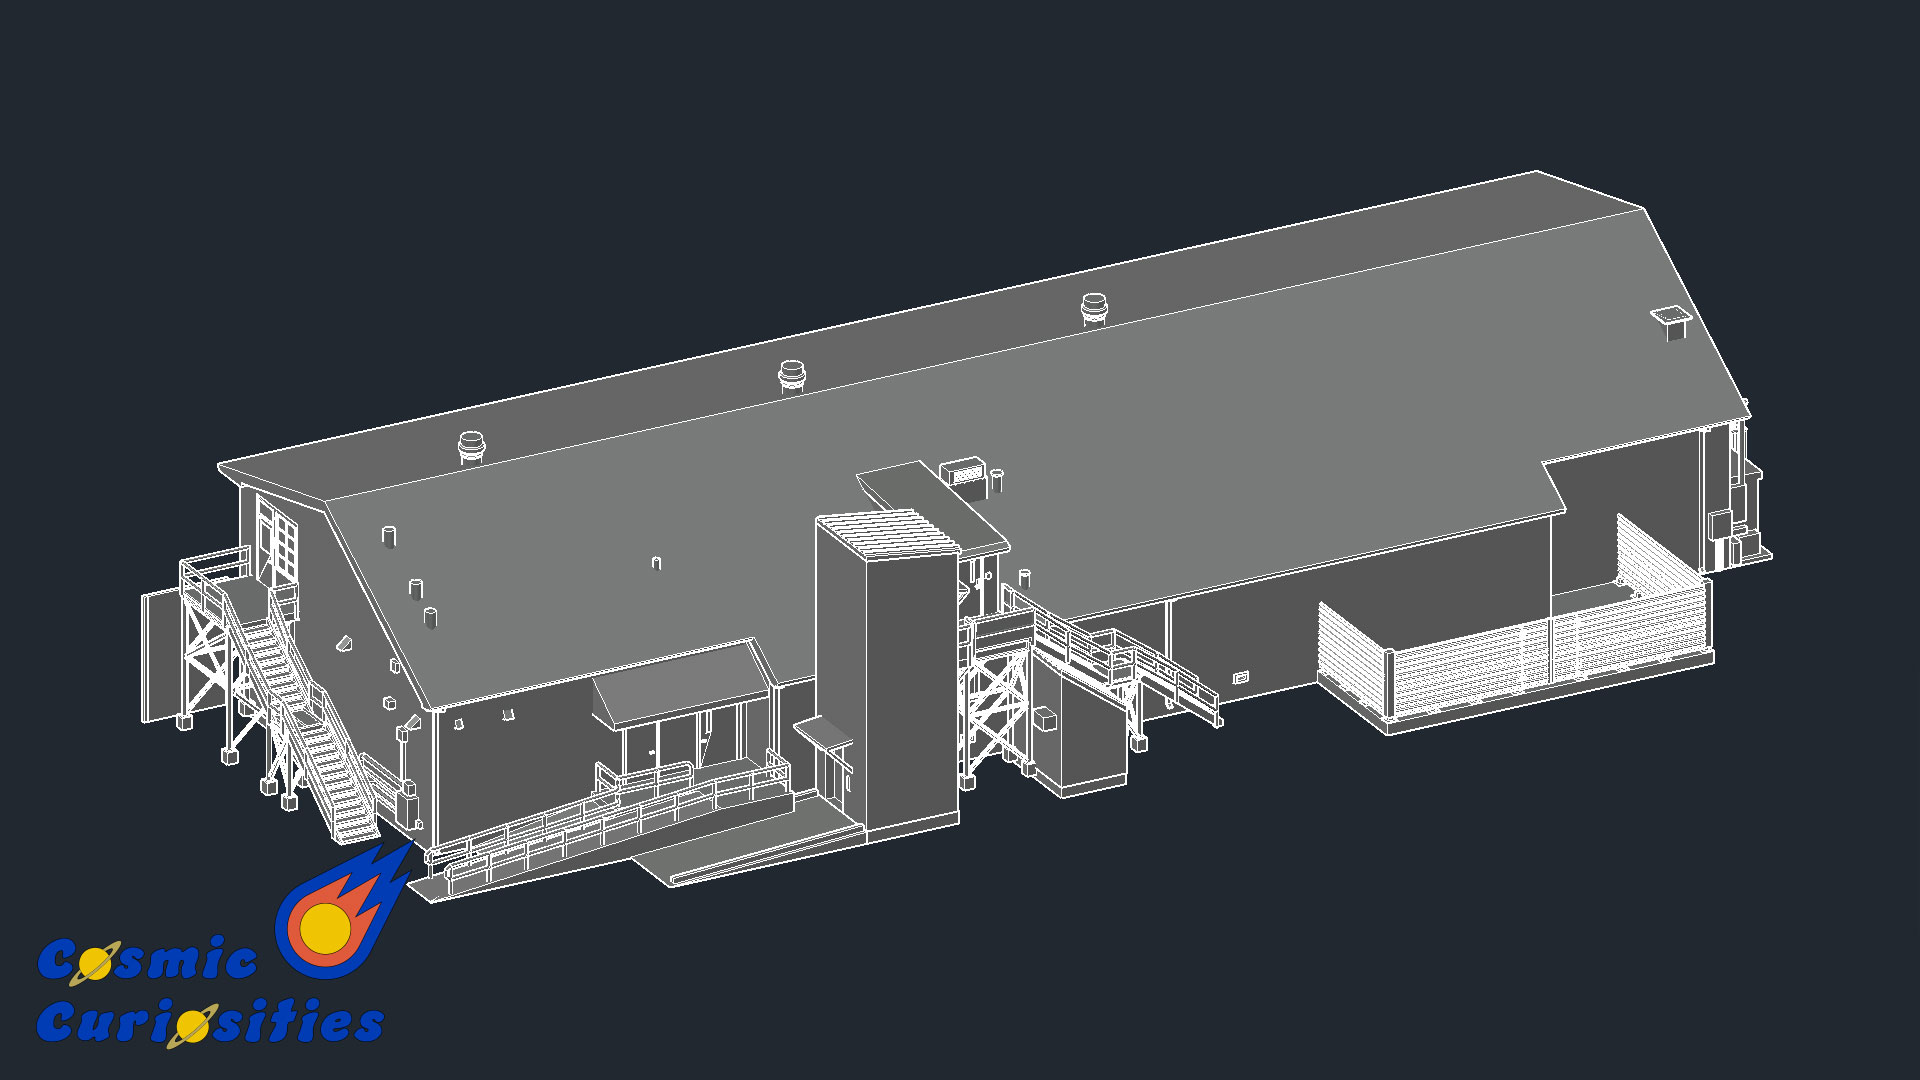
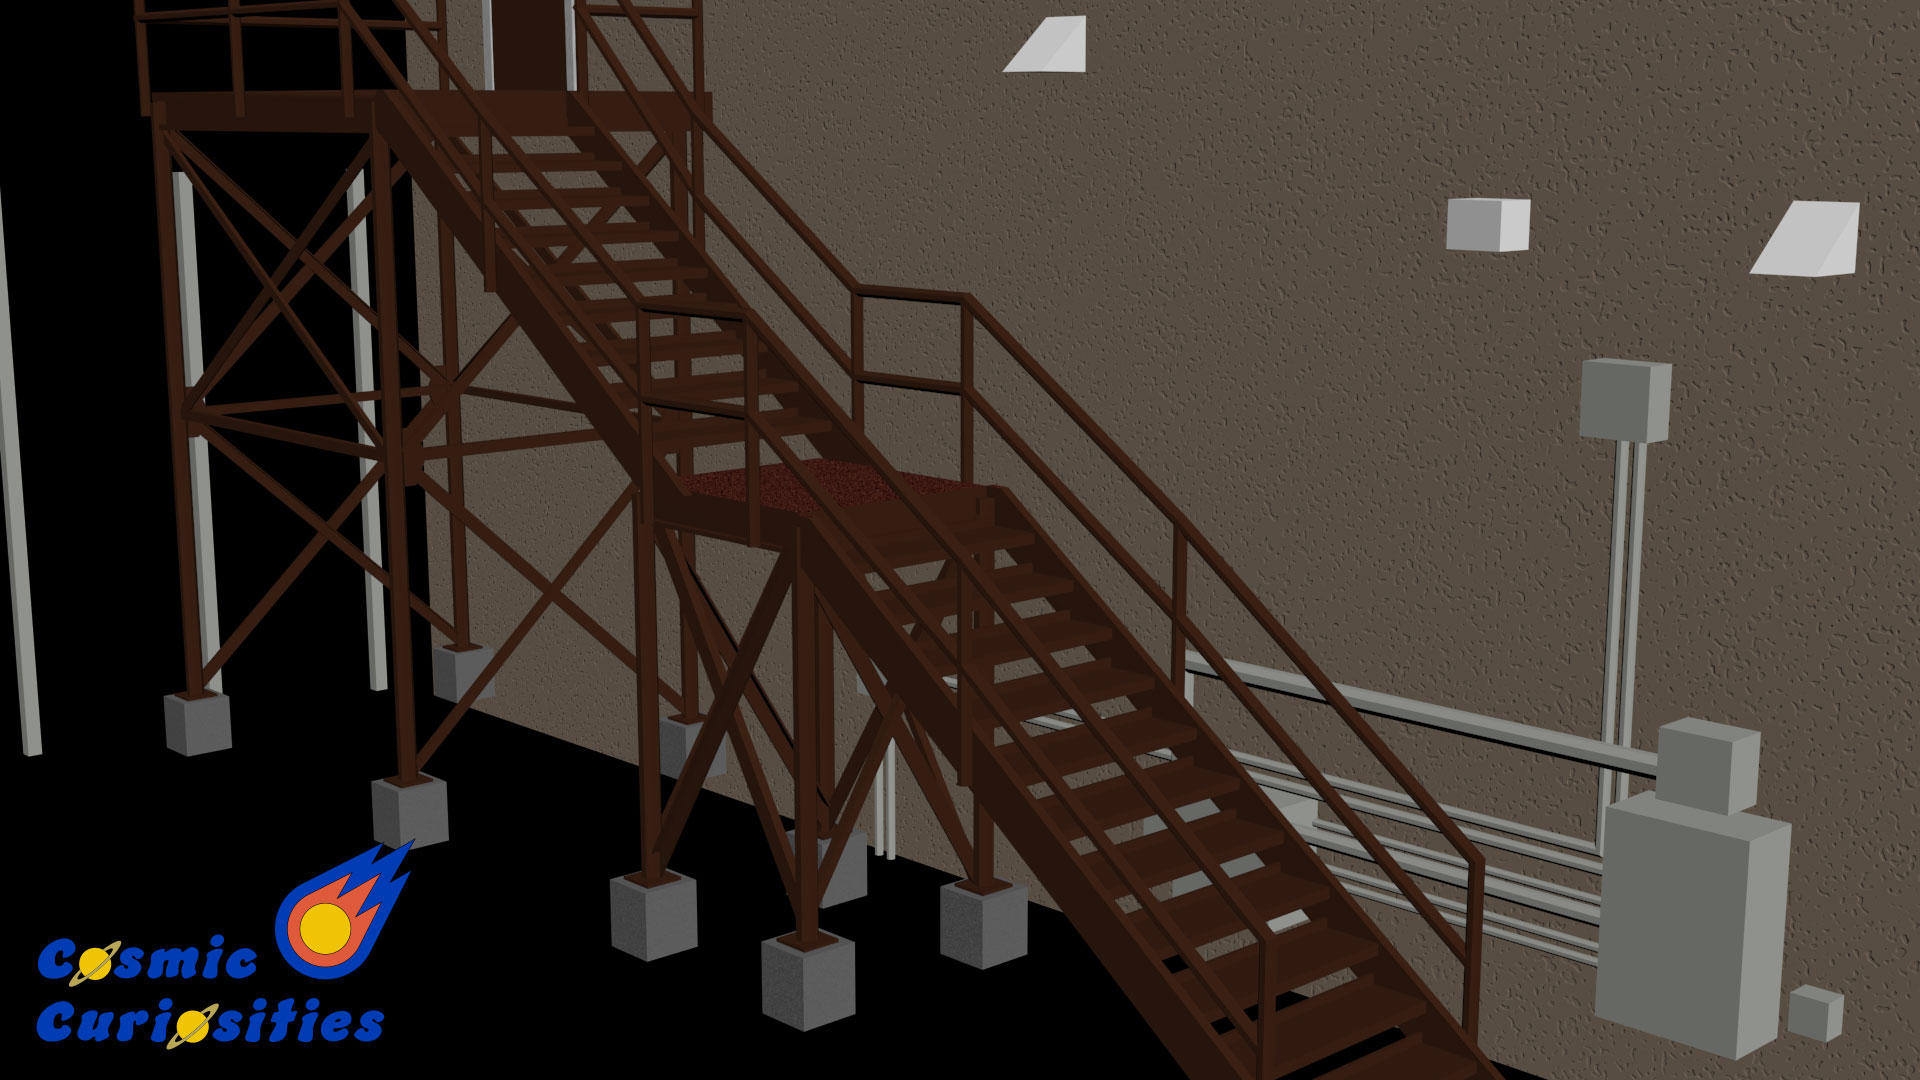
Once my art building was fully segmented, we sampled the point cloud and imported it into AutoCAD. Sampling the cloud was important because this reduces the amounts of points there are in the point cloud and makes it easier for AutoCAD to handle. This was the point were I realized I had a lot of work cutout for me. I realized how intricate the stairs and rails on the ramp were and how much time it was going to take to 3D model. I'd say just modeling the stairs and the rails took up more time than modeling the rest of the building. On top of that, I had seen AutoCAD as notoriously difficult to 3D model in. However, by the end I became very confident 3D modeling in AutoCAD. Once I was finally done modeling this high resolution art building, I had to move on to making the low resolution version. This required me to changes the roundness of the rails and pipes into having an octagonal profile. Essentially, I had to turn cyliners into octagonal prisms. This is to the Hololense would have to process less polygons. Luckily I did not have to make the low resolution model from scratch. I just had to make a copy of the file and replace the round objects with octagonal objects.
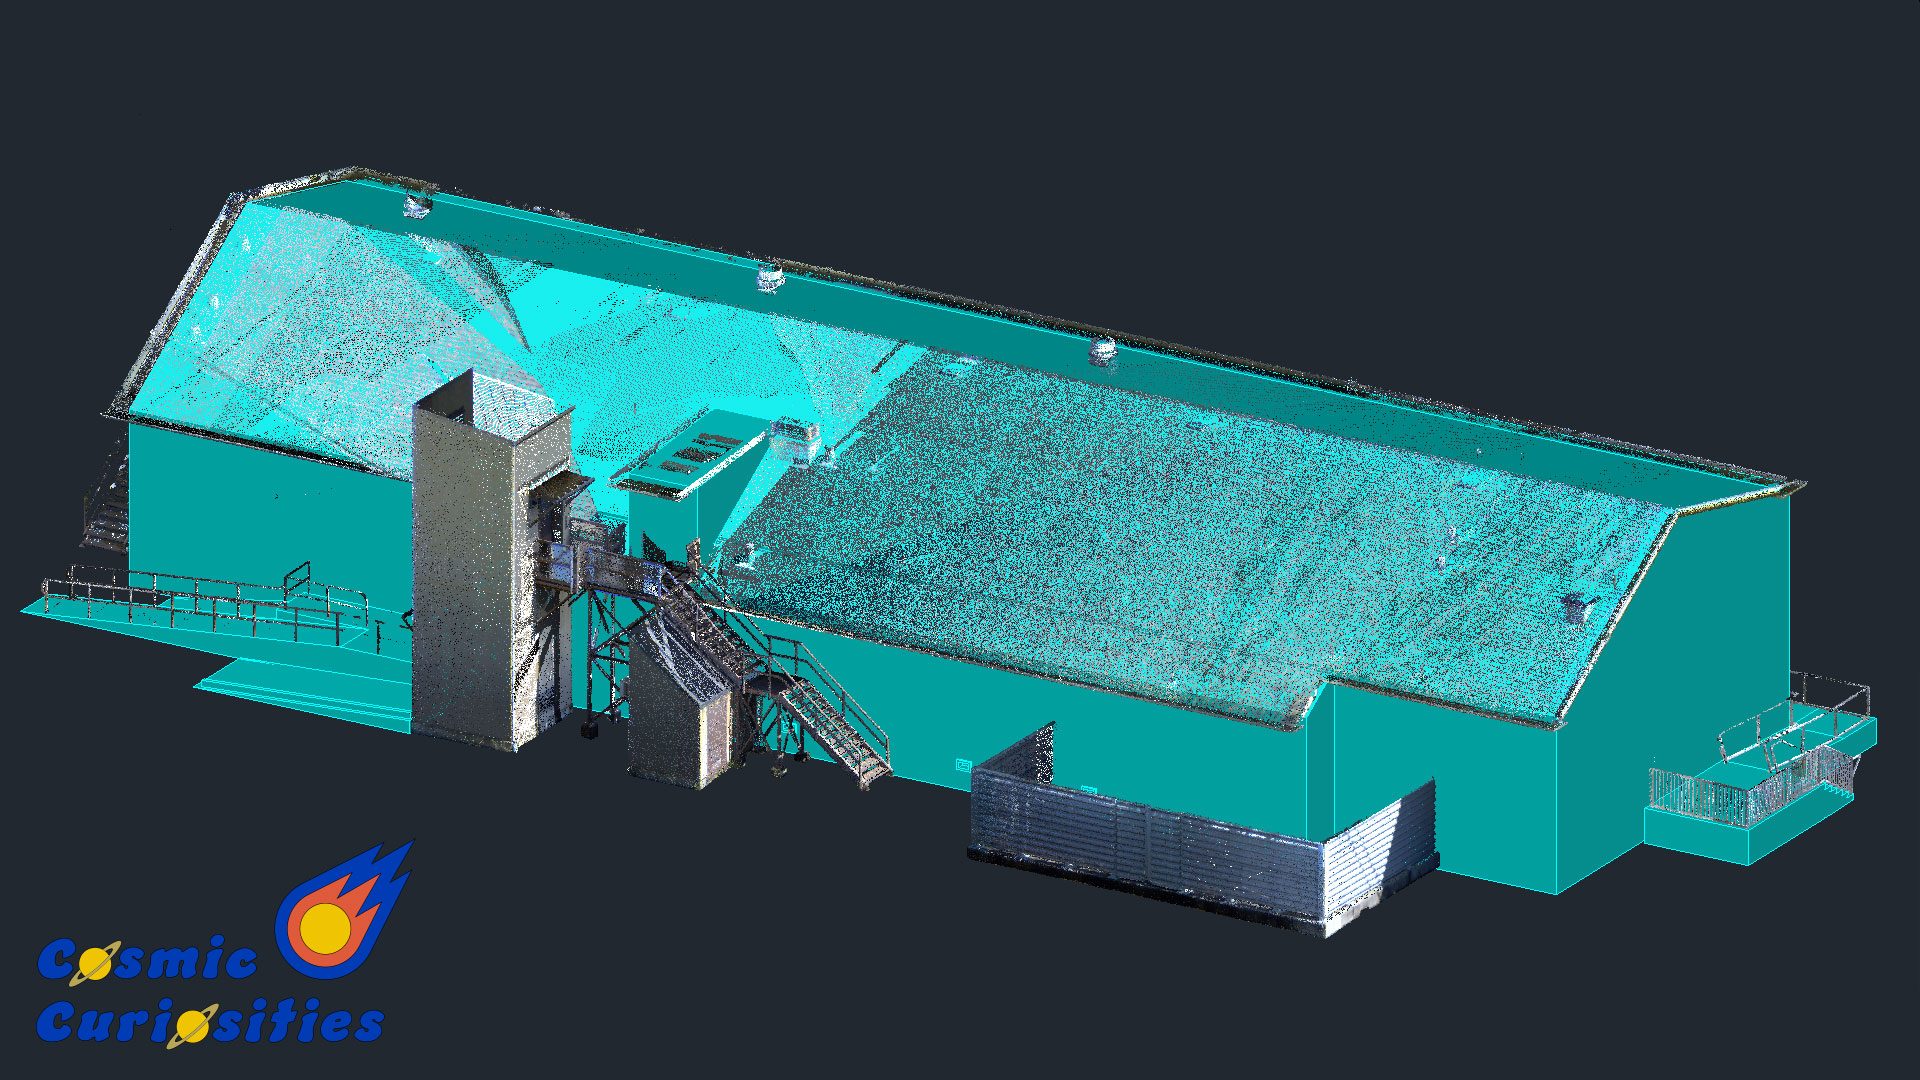
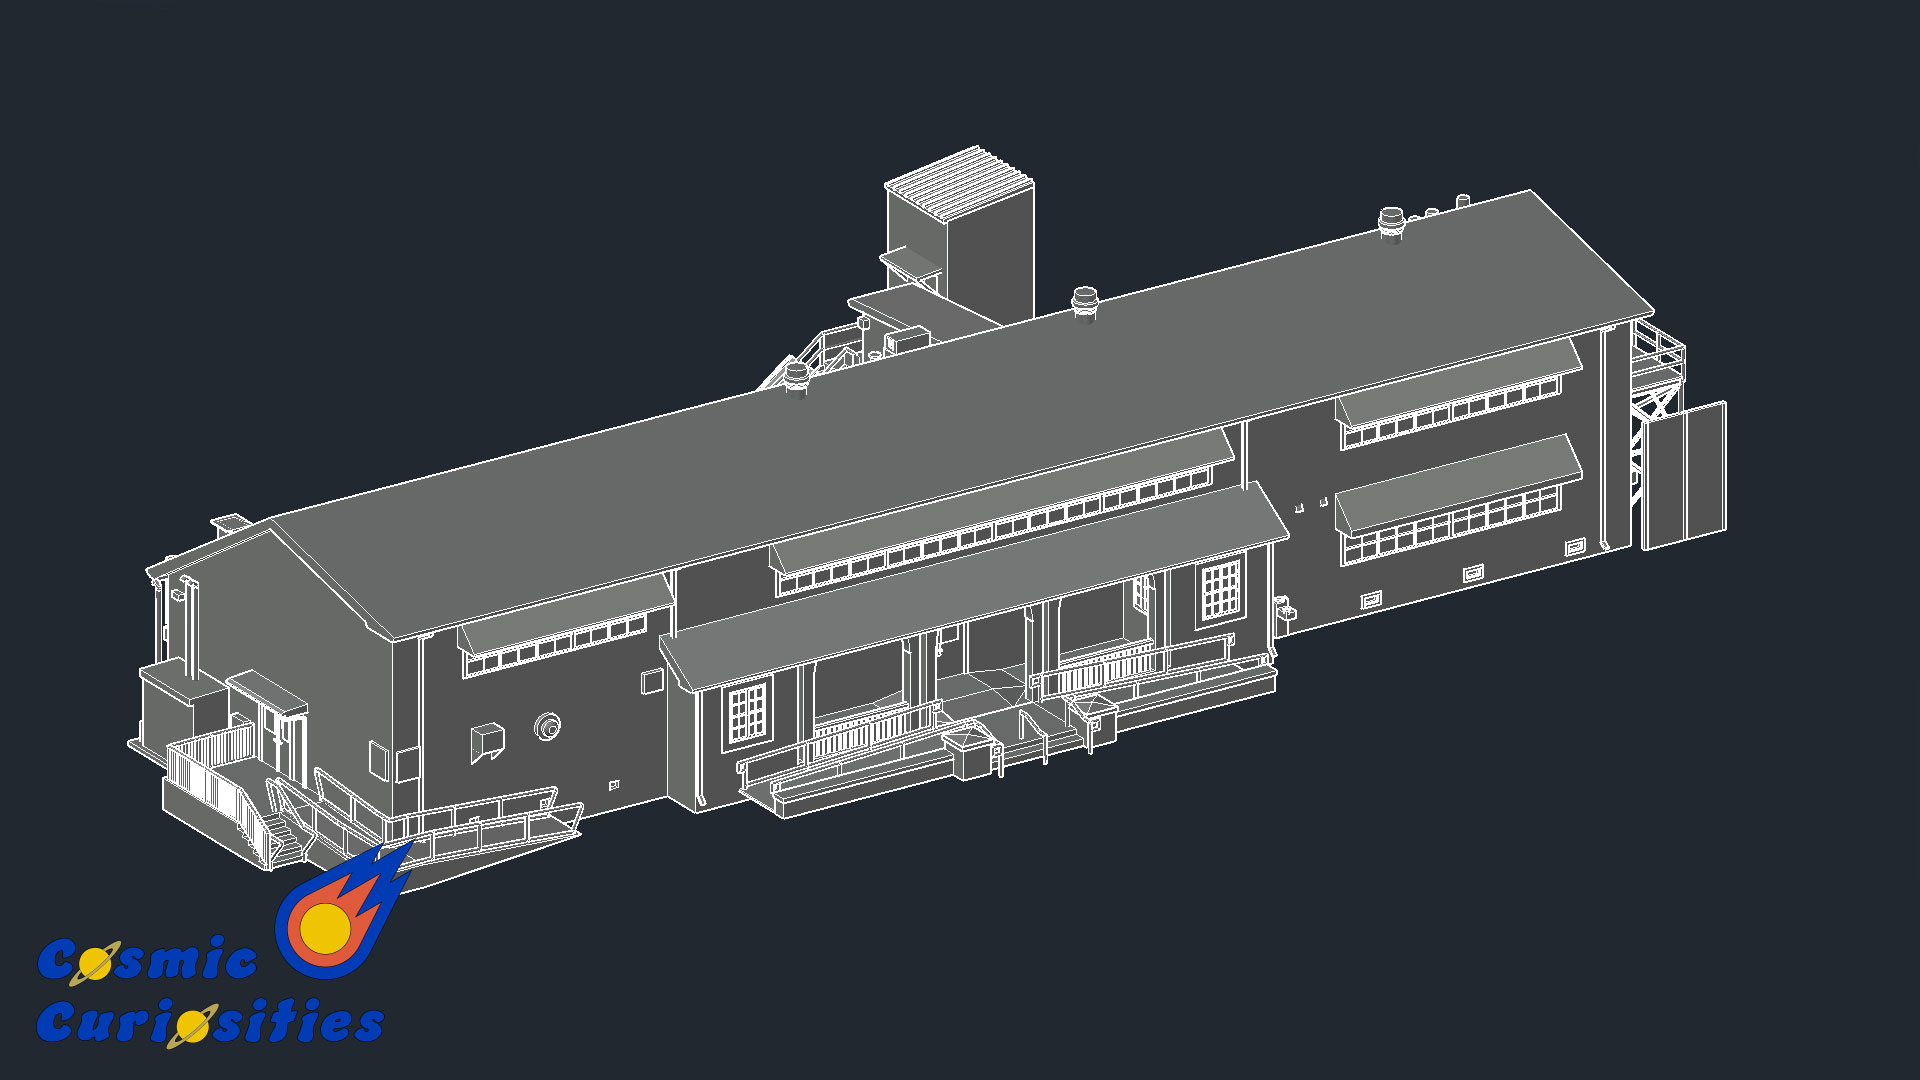
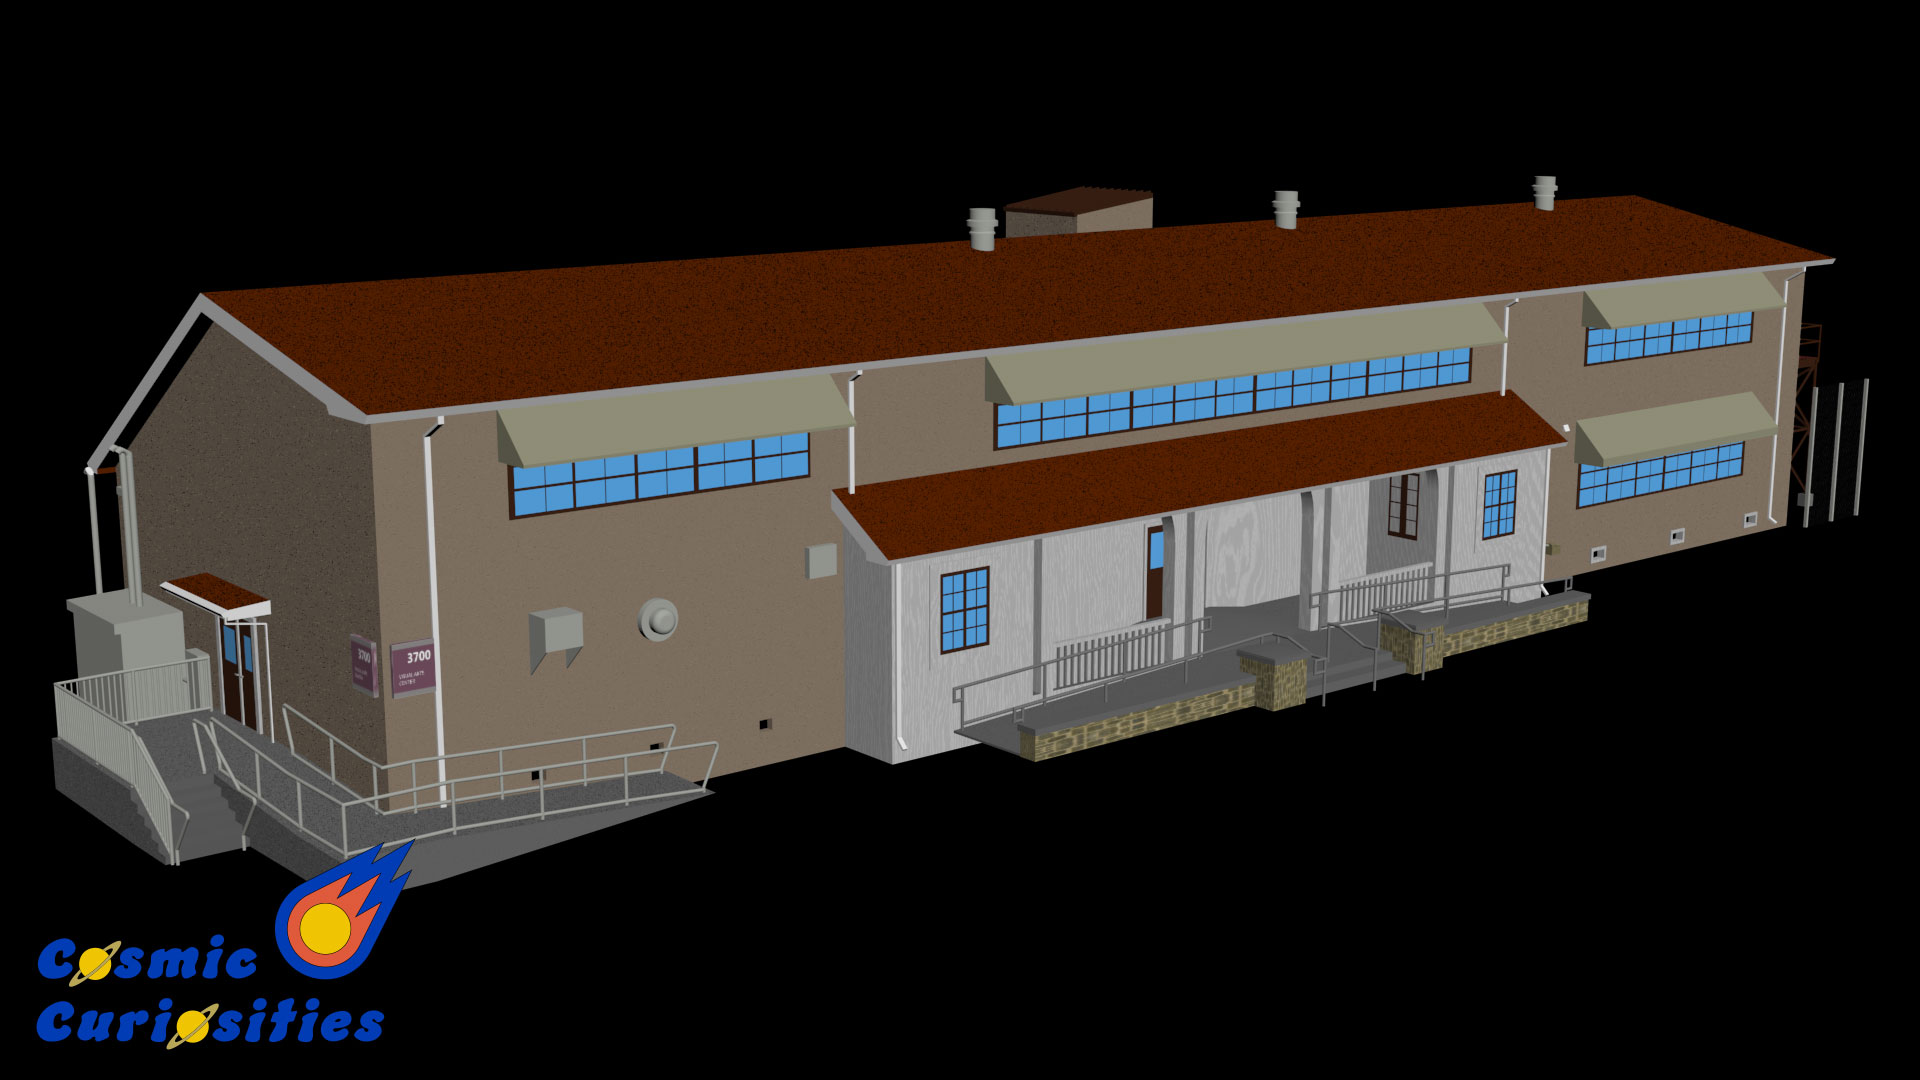
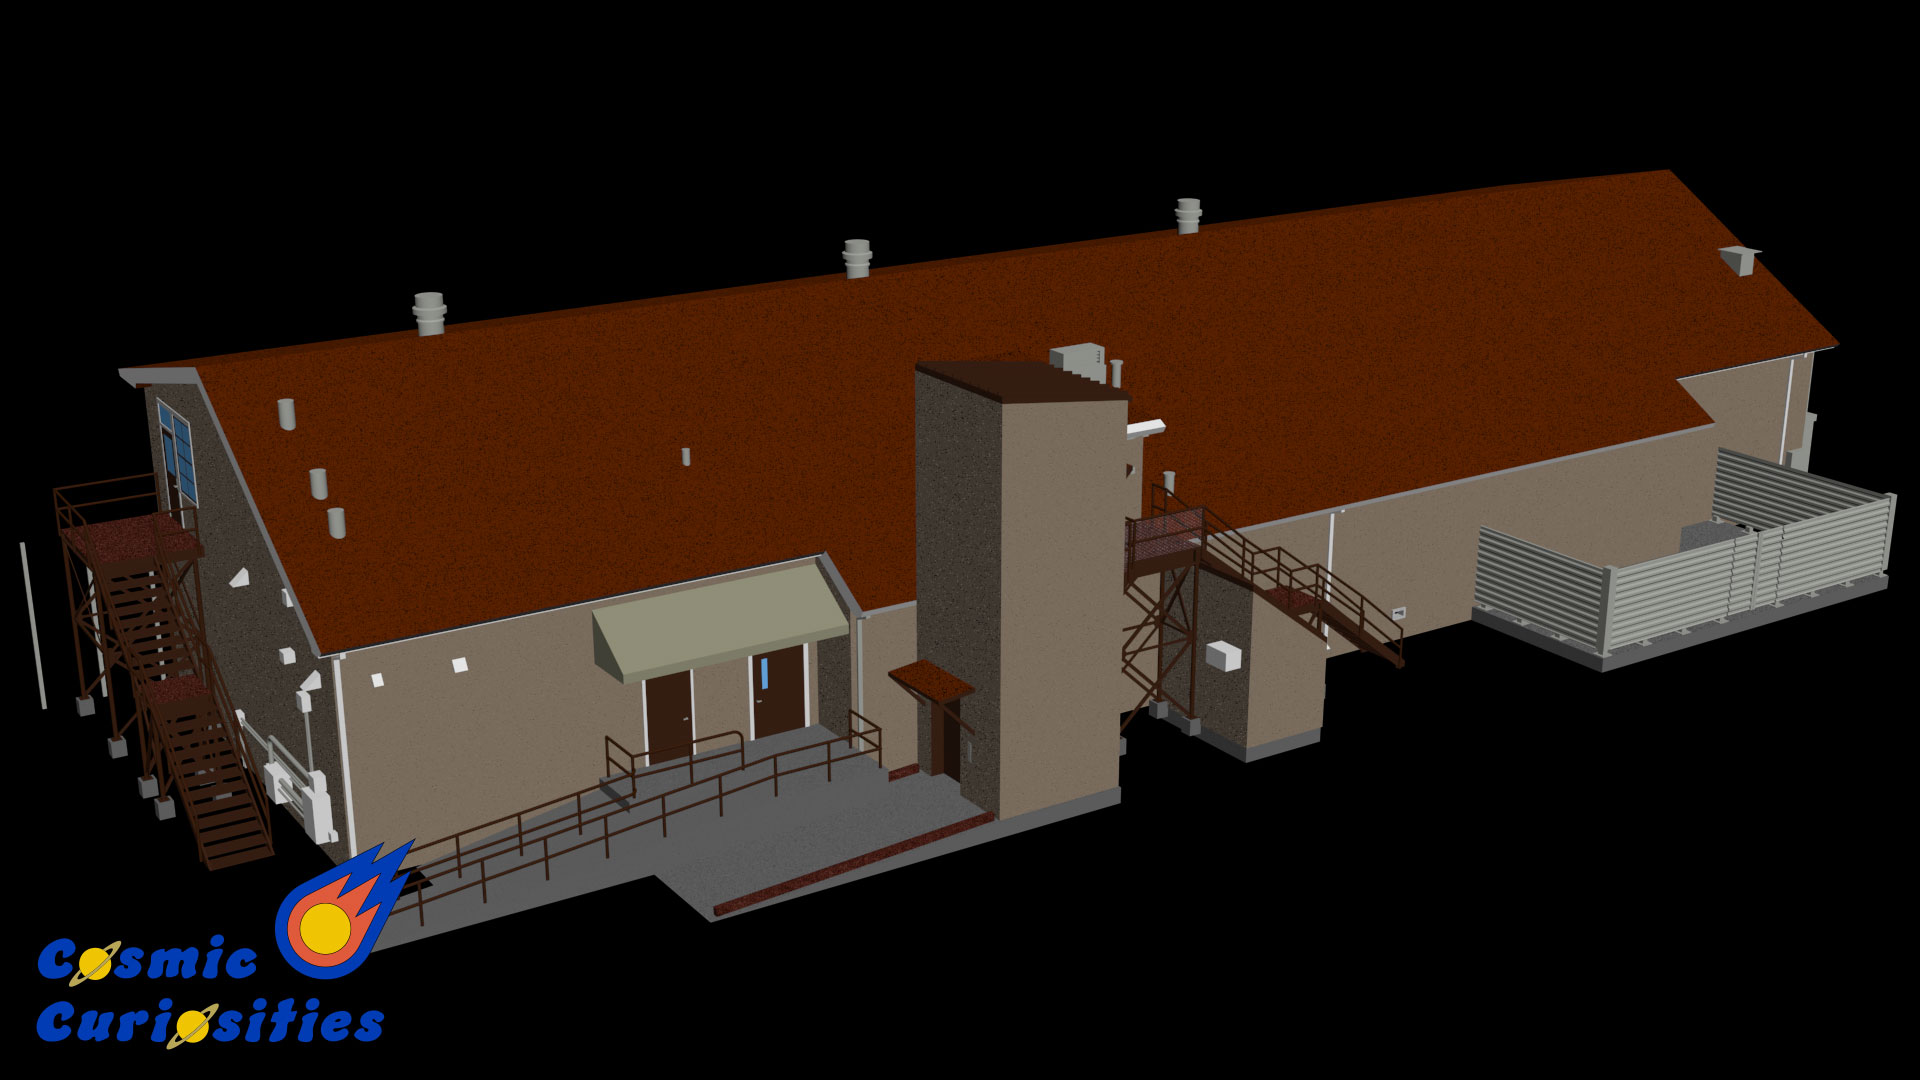
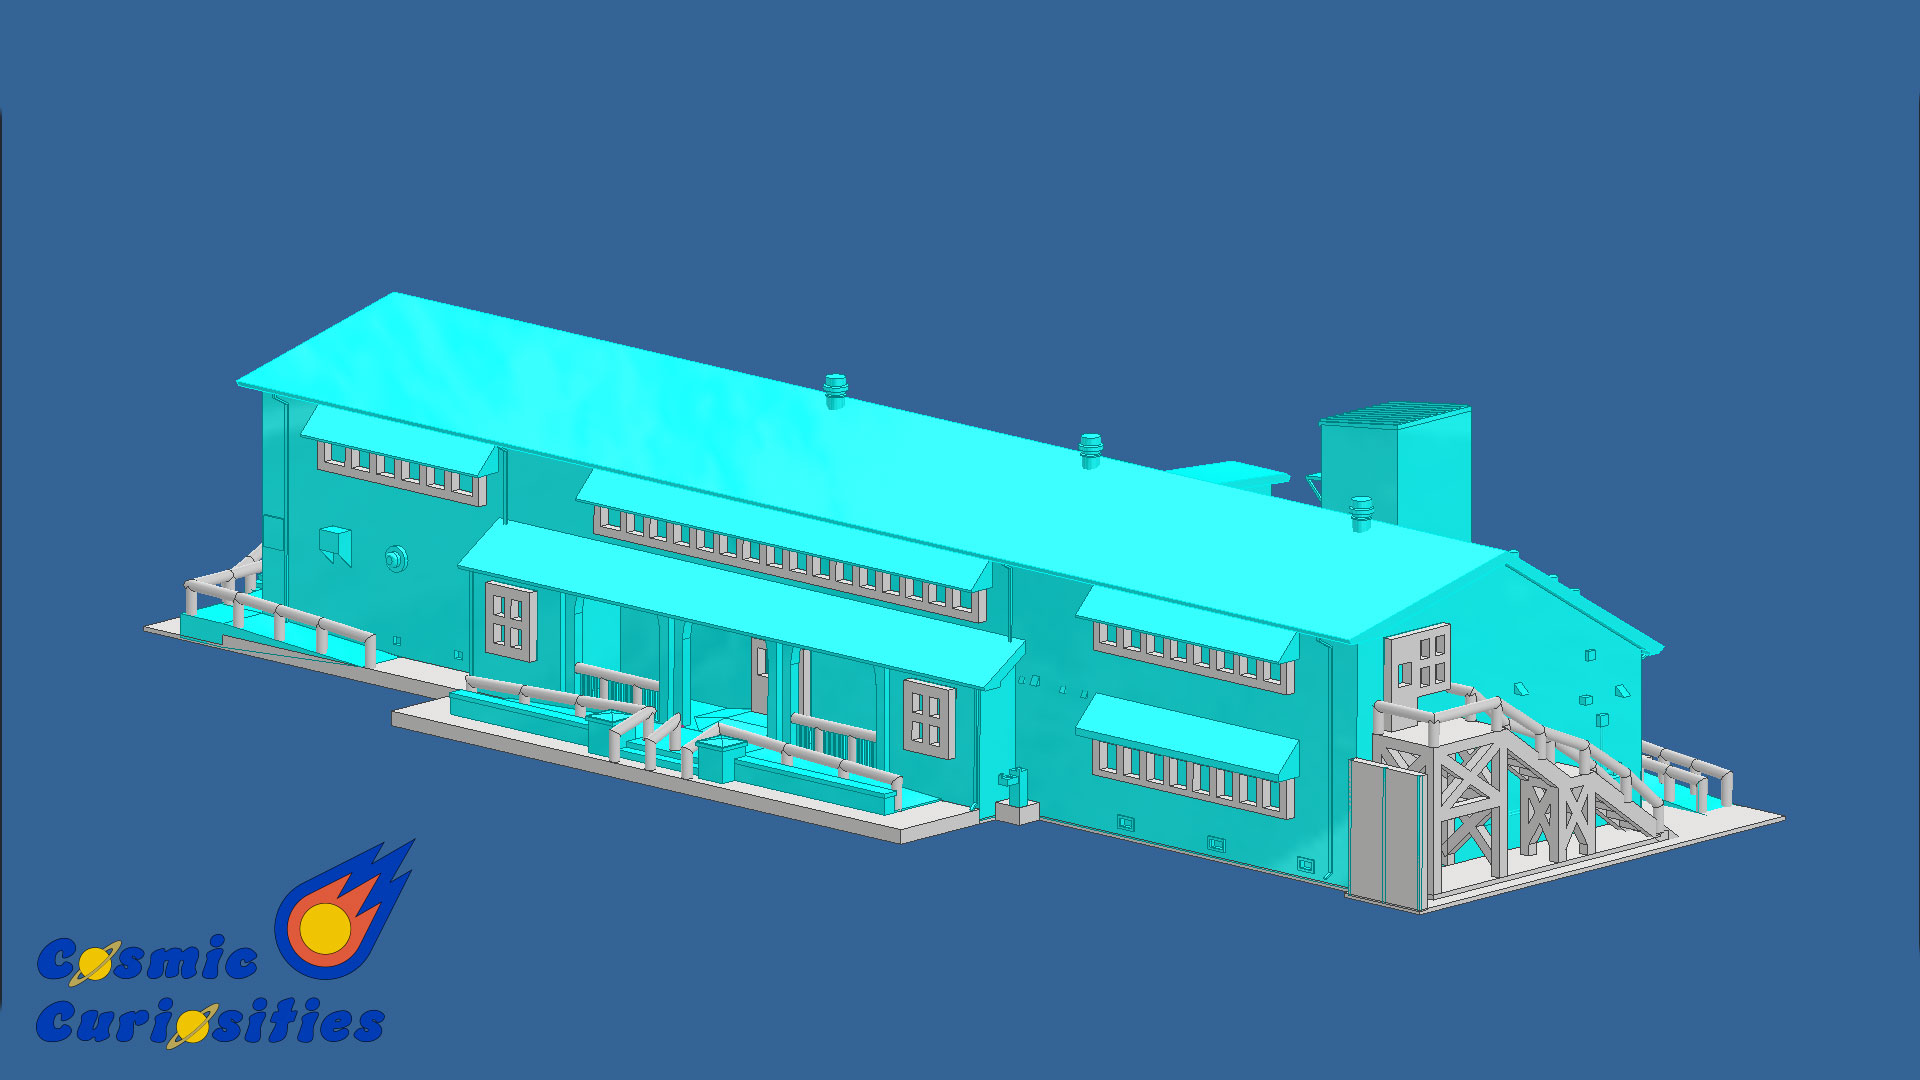
Once all of the 3D modeling was done, I could finally import it into 3ds Max to add materials. It took quite a bit of time to not only decide which material goes where, but also to create my own materials. I had always been a little shaky when it came to materials in 3ds Max but after this project I had a good grasp on what I was doing. I'm probably most proud of the little purple sign on the corner of the buildng that you can see in the first picture below. To create that, I took a measurement of the sign in AutoCAD and created a graphic in photoshop with the same measurments based on a picture I took of the actual sign. I spent a good amount of time trying to get the font just right. I then used that graphic to put onto a material and applied that material to the model. I had apply all of these materials again onto the low resolution model as well, but I though of a quick work around so I didn't have to create all materials over again. I simply made a copy of the file, deleted the high resolution geometry, and imported the low resolution geometry. This way, I still had all the same materials as the high resolution model.
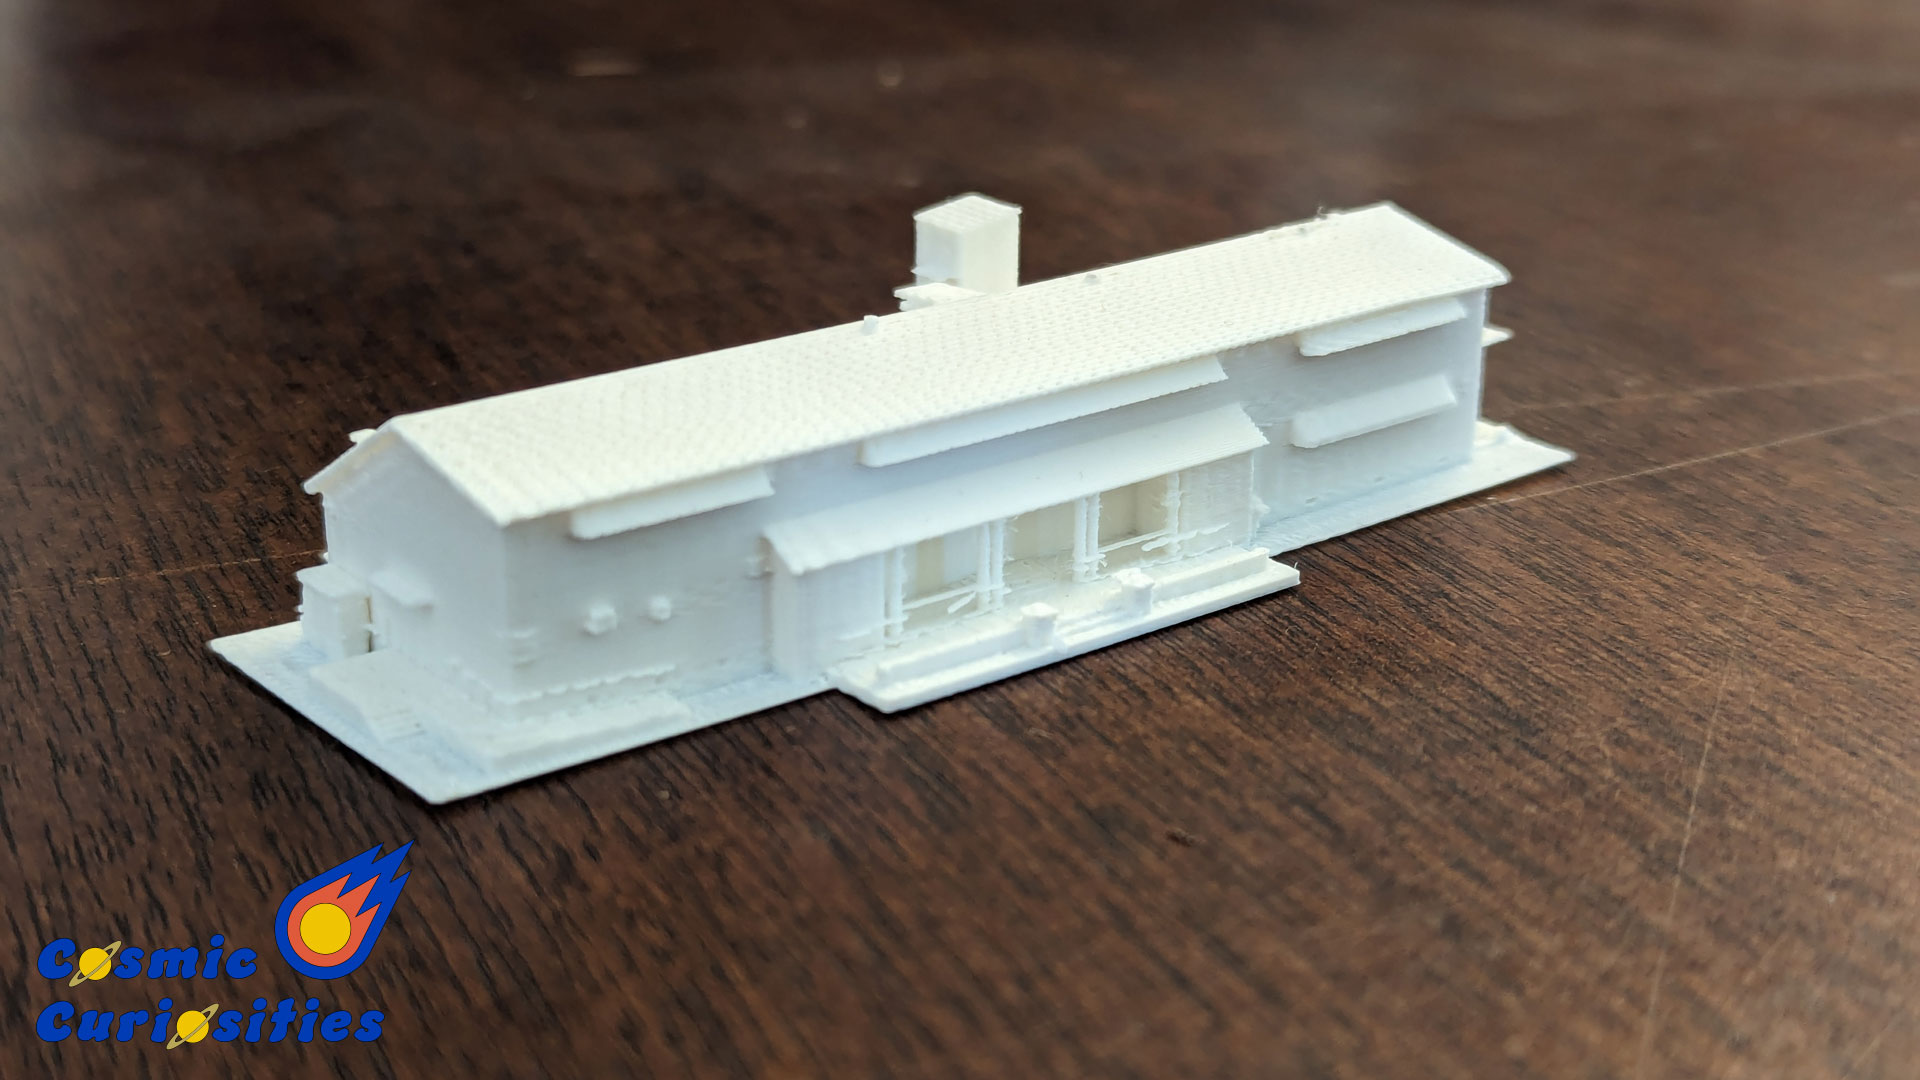
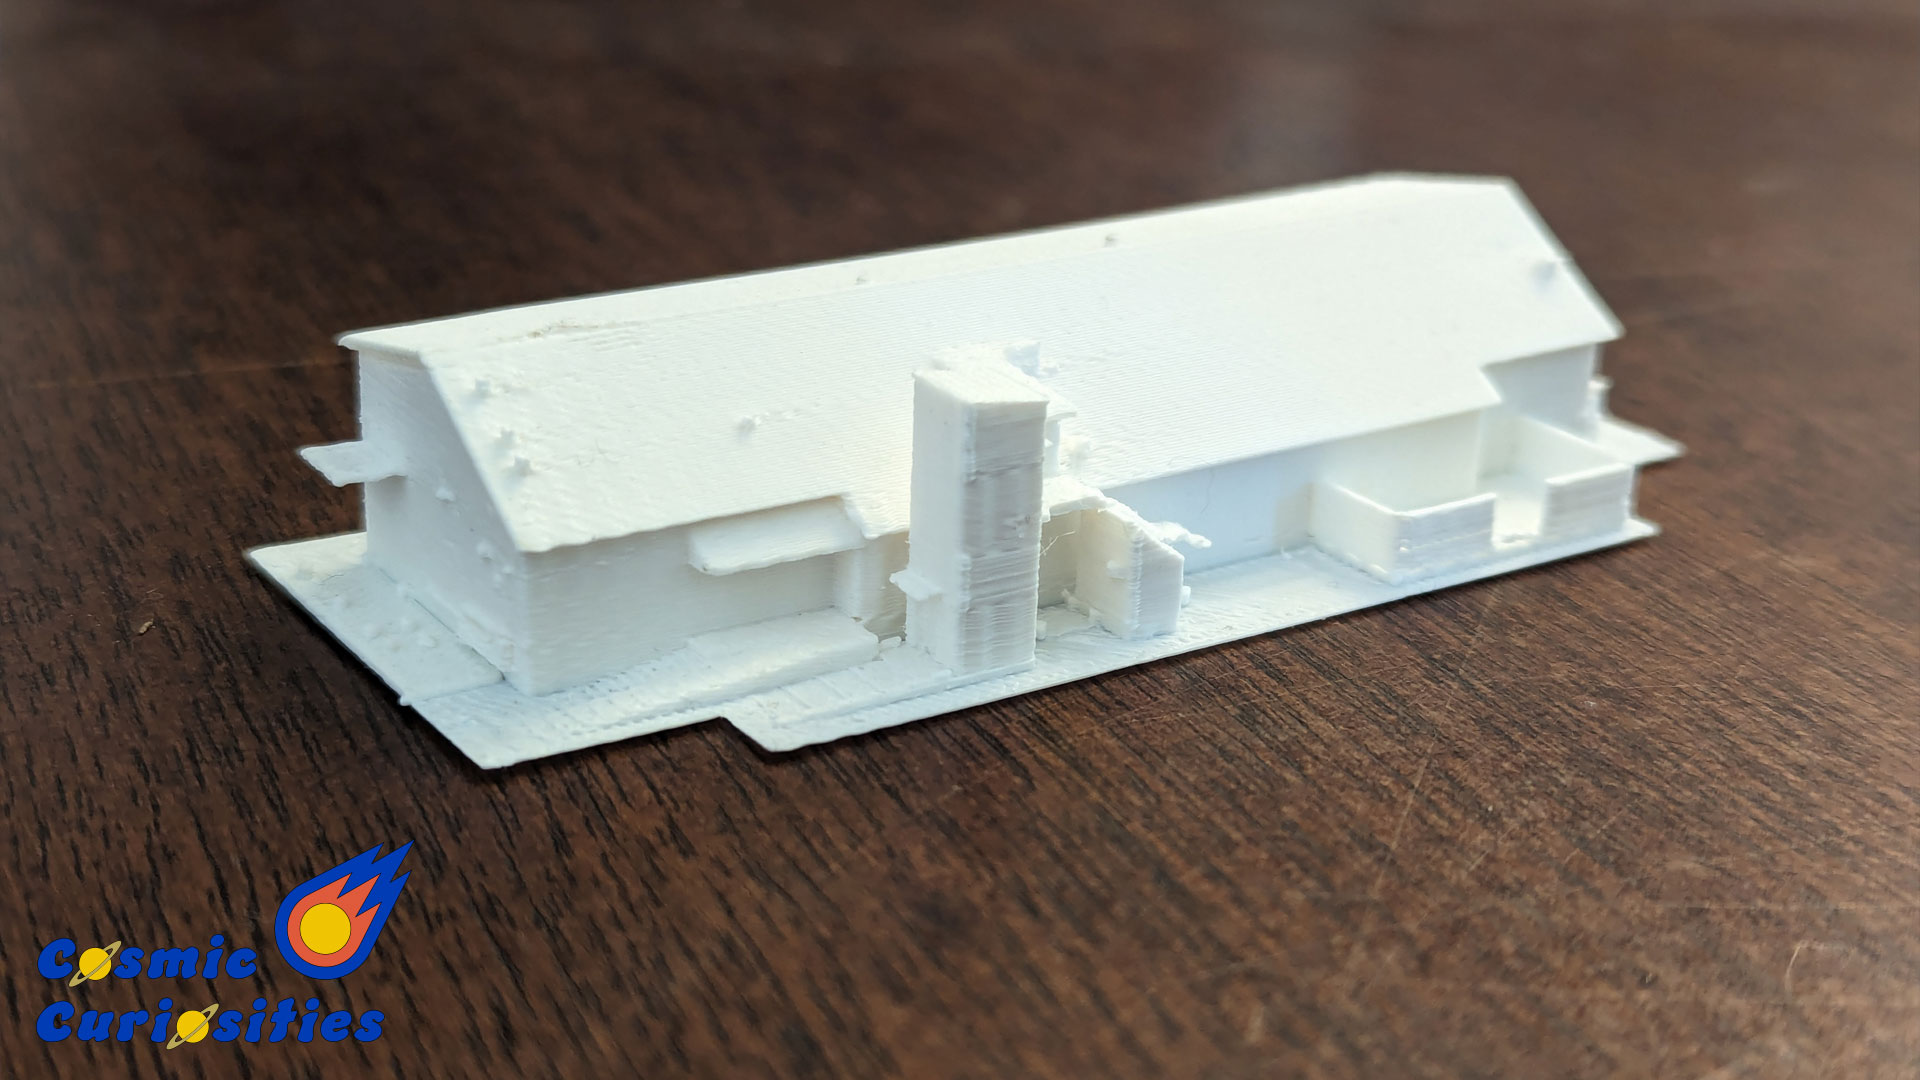
Lastly, in order to create the 3D printed model of the building, I imported the original AutoCAD model into Inventor. We chose Inventor because of how easy it is to convert the model into an STL. In the AutoCAD model we had to scale down the building to 1/500 of the size. The original models were made to scale of the actual building. The two pictures of the 3D printed art building are unmodified versions of the model. We essential printed the AutoCAD model as is in order to see what parts of the model needed to be thickened. As you can see, the stairs and the rails were too thin too print. Those pesky stairs and rails. The first picture below is the modified 3D model where I thickened the stairs, rails, doors, and windows so that they were
An that was it! This project was dont over the course of 16 weeks and looking back, I am very proud of what I accomplished. By the end of this project, I was so sick of stairs and rails and this art building. It didn't help that I had to walk past this building every time I went to class. It was almost trippy to see this building in person after modeling it in AutoCAD. Every time I walked past the building I remembered every single surface, corner, and detail of this building. I never thought I would have a connection like this to a building. It was like the physical building and the virtual building were taking up the same space in my mind.